

If your countertop is uneven or not level, you will have to scribe and cut the first row of tiles to achieve a level and straight installation.
The objective of this installation process is to cut a small amount of Aspect Stone material off of the bottom of each tile in the bottom row so that it follows the uneven countertop. At the same time, the tops of each tile must be straight and level. With a straight and level countertop, the first row guide line is typically snapped at the highest point of the countertop. In this case, however, we will snap our guide line at the lowest point of the countertop.
1. Lay a level on the countertop and determine the lowest point.

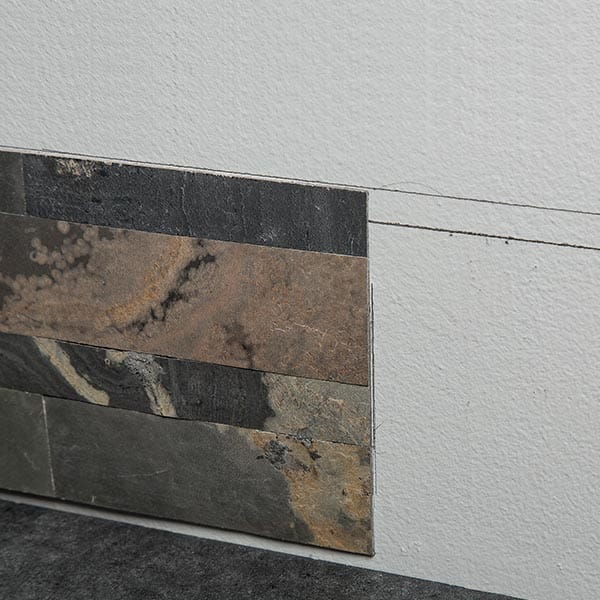
2. Measure up 6-1/2-inches from the low point and snap or draw a level line across the area to be covered in Aspect Stone tiles. This line is the scribe reference line.

3. Then snap or draw a line 1/2-inch below the first line. This second line is where the tops of each cut tile will be aligned as the tiles are installed onto the wall.

4. Use coins, a wood block or other material to hold the point of a pencil 1/2-inch off of the countertop. All scribing and cutting of tiles must be done with the adhesive backer, or release film, remaining on the tiles.
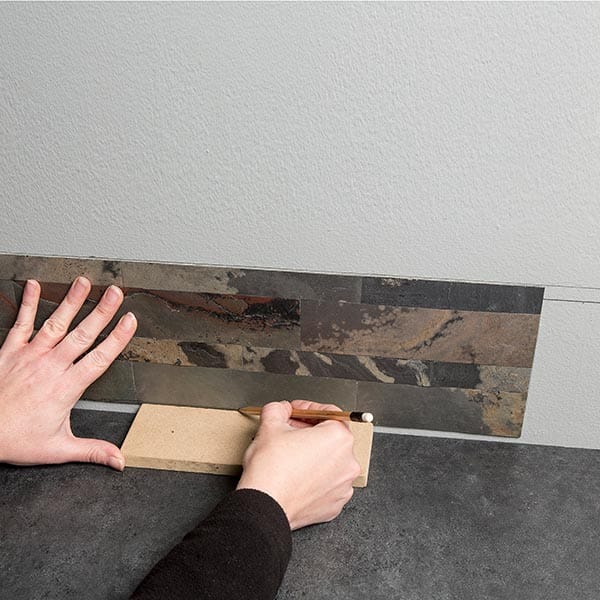
5. Place your first tile (either left, right or center) with its top edge aligned to the 6-1/2-inch mark. Lightly mark either the left or right edge of the tile on the wall so placement is consistent.
6. Scribe along the tile bottom using the pencil held off the countertop 1/2-inch.

7. Cut the tile along the scribed line using a tin snips.

8. Dry fit the tile to your edge mark and the lower line. Recut, file or adjust as necessary for each tile in the first row.

Done correctly, the first row now aligns with the lower line and fits nicely along the countertop. Install the remaining tiles according to the Aspect Peel and Stick Stone Tile Backsplash Installation Guide.