

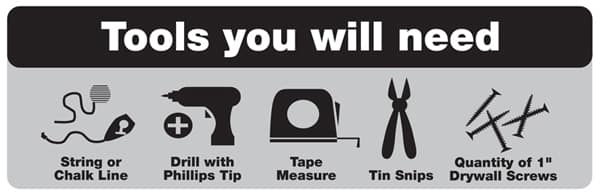
Please read these instructions in their entirety before beginning your CeilingMAX Surface Mount Grid Installation
ACP, LLC is not responsible or liable for any labor costs or damaged product incurred as a result of improper installation. All product defects are covered under our 5-year limited warranty.
Due to manufacturing variations, we cannot guarantee an exact color match from lot to lot. Prior to installing CeilingMAX ceiling grid system to your ceiling, please unpackage & lay out all purchased product to ensure color consistency. If you encounter unreasonable color variation, please give us a call at 1-800-434-3750 (7am-4:30pm CST, M-F) so that we may assist you with your project
Room Planning – Establishing Alignment
To ensure professional looking results, the room layout should be balanced with equal size border panels used on opposite sides of the room, as shown below.

Beginning Installation
Establish your string (or dryline) at this measurement. Repeat these same steps for the other direction.
Step 1 – Attaching the Wall Bracket
The Wall Bracket is 8′ long and is installed around the perimeter of the room. (Read Tip 3) Using screws, install the Wall Brackets around the perimeter of the room, directly beneath the joists or finished ceiling. Drywall screws can be installed into the ceiling, joists or wall, and should be spaced 16″ to 24″ apart.


Step 2 – Fasten Top Hangers
The Top Hanger is 8′ long and is fastened to joists or existing ceiling. Top Hangers will be installed either perpendicular to exposed joists or across the longest dimension. Using a string or chalk line, establish the drylines as determined above. The first row of Top Hangers and Cross Tees will be centered over these drylines.
NOTE: Be sure the intersection of drylines is square.
Measure and cut your first Top Hanger so the notch is aligned over the Cross Tee dryline, with the cut end resting in the Wall Bracket.
NOTE: If your measurement from the chalk line to wall is less than 12″, use the first notch on the Top Hanger to measure from. If greater than 12″, measure from the second notch to make your cut. Repeat this step for as many rows as needed and set aside for Step 4.


Using a drill with Phillips tip, attach the first row of Top Hangers to the joist or current ceiling with screws, placing one screw in each joist, alternating sides as shown. If joists are not exposed, screws should be no more than 16″- 24″ apart.
To install additional Top Hangers in line, cut a 6″ section of Runner and use it as a temporary splice to connect the installed Top Hanger to the one to be hung. When the first row is complete, cut the last Top Hanger in the row so it fits into the Wall Bracket.

Step 3 – Installing Top Hanger and Cross Tees
The Cross Tee is 23″ and is installed perpendicular to the Top Hanger to create grid support. Using the pre-cut Top Hangers from Step 2, align the first notch with the Cross Tee dryline. Using an uncut Cross Tee as a spacer, place one end in the notch of the previously installed Top Hanger. Place the other end in the matching notch of the next Top Hanger. Make certain that both ends of the Cross Tee fit snugly into the notches, then attach Top Hanger using screws. Continue to install uncut Cross Tees parallel to the previous row. Cut the last Top Hanger to fit into Wall Bracket. Continue installation of rows. When all the rows are installed, measure, cut and install the first and last row of Cross Tees, resting the cut ends in the wall bracket. Do not install the last Cross Tee in the border rows until Step 5.


Step 4 – Cutting and Placing Border Ceiling Tiles
Beginning where the first Top Hanger was installed, cut ceiling tiles to fit each location and slide into the Wall Bracket. Rock the Cross Tee slightly as you insert the tile. When the end ceiling tile is correctly cut to size and in place, install the final Cross Tee.
Step 5 – Locking in the Runner
The Runner is 8′ long and snaps into the Top Hanger, locking the grid system and ceiling tiles. Install full ceiling tiles in the remaining rows by rocking the Cross Tee and placing each tile in the grid system. As each row of ceiling tiles is put into place, finish the installation by snapping the Runners into the Top Hangers as shown below. Cut the last row of Runners as required.


Installation Tips

- Before you begin, box in any ducts, piping or window openings as shown above.
- Light fixtures can be installed or adjusted to align with the CeilingMAX grid system. Make sure to provide adequate space (1/4″ preferred) between the outer dimensions of the fixture and the ceiling tile. This is especially important when lighting is recessed incandescent.
NOTE: If you plan to use lighting designed for use with suspended ceiling systems, be certain the fixture is supported by the joists, not the CeilingMAX grid system. - To accommodate 1/2″ conduit or pipes, notch the vertical portion of the Cross Tee or Runner.
- If using 2′ x 4′ tile, round the 4′ tile side of room measurement down to nearest number divisible by 4. Add 48″ to remainder and divide by 2 to determine border tile size.
- If your existing ceiling is not level you may need to furr the ceiling or place shims behind the Top Hangers to level. If the adjustment is minimal, you can back out the screws in the Top Hangers.
- Prior to grid installation, snapping in the runners to the top hangers will help open up the channel of the top hanger as the initial fit of the runner to top hanger connection is a tight fit, designed for strength and durability.
- A lubricant can aid in the connection of Runner to Top Hanger. Try cooking oil or Vaseline on a rag or finger running down both edges of Runner.