

Watch the video and see the guide below
Room Planning – Determine the Room Layout
ACP, LLC is not responsible or liable for any labor costs or damaged product incurred as a result of improper installation. All product defects are covered under our 5-year limited warranty.
Due to manufacturing variations, we cannot guarantee an exact color match from lot to lot. Prior to installing HG-Grid ceiling grid system to your ceiling, please unpackage & lay out all purchased product to ensure color consistency. If you encounter unreasonable color variation, please give us a call at 1-800-434-3750 (7am-4:30pm CST, M-F) so that we may assist you with your project.
To ensure professional looking results, the room layout should be balanced – equal size border panels used on opposite sides of the room, as shown below. The 8′ Mains can be installed in either direction, but if 2′ x 4′ trouffer lights are being used the Mains should be installed parallel to the 4′ side of the lights.

At the finished ceiling height establish your Main dryline or chalk line at this measurement. Fasten the dryline at the desired ceiling height drop. Repeat these same steps for Cross Tee dryline in the opposite direction. (See Tips #1 & #2)
Step 1 – Install the Wall Brackets
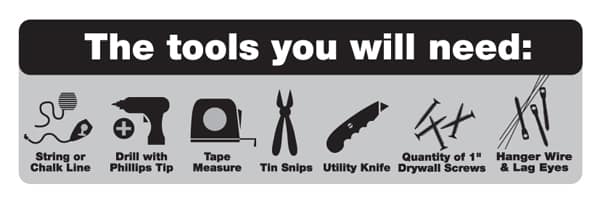
Snap a chalk line on the wall 15/16″ above the desired finished ceiling height. Align the wall angle so the top of the angle meets the chalk line. Using a drill with a Phillips tip, fasten the wall angle using 1″ drywall screws every 16″ on-center (at the stud location). Where two angles meet at the corner they can be mitered or overlapped.
Step 2 – Install the Hanging Wires and the First Row of Mains
Starting at the intersection of the drylines, using a lag-eye, install the first hanger wire to the existing ceiling above. Working down the Main dryline install subsequent hanger wires 24″ on-center. Hanger wires should be installed across the room in subsequent rows 24″ on-center. (See Tips #3 & #4)
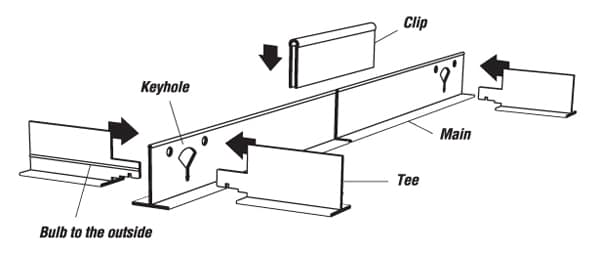
Measure and cut your first Main so the keyhole is aligned under the Cross Tee dryline. Holding so the bottom face of the Main is level with the dryline, bend and insert the hanger wire through the wire holes above the keyhole. To complete, bend and wrap the wires around them-selves three times. Install subsequent Mains by sliding the Connector Clip halfway across the next Main to secure. (Mains are sold with Connector Clips already attached.)
Cut the last Main in the row so that the Main fits tightly into the wall angle. In a similar manner, install the remaining rows of Mains 24″ on-center.
Step 3 – Installing the Cross Tees
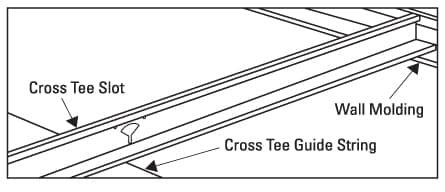
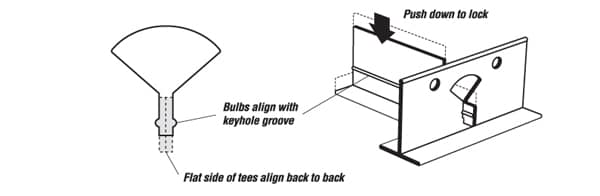
Install the border panel Cross Tees by measuring the distance from the wall to the Main. At this dimension cut so the Cross Tee fits tightly into the wall angle. Install additional Cross Tees by snapping the tee hook into the keyhole. The bulbs on the Cross Tee should always face outward and snap into the keyhole indentation. Working across the room alternate the Cross Tees so the bulbs face opposite directions. (See Tips #5)
Step 4 – Cutting and Placing the Ceiling Panels
Beginning at the edge of the room, cut the border panels to fit accordingly. After completing the border panels insert the full panels to complete.
Installation Tips
- To ensure a perfectly level ceiling, drylines should be installed at the finished ceiling height perpendicular to the Mains every 4′ across the room.
- A minimum drop of 4″ is required. If smaller ceiling height drop is desired reference our surface mount grid system.
- When installing under joists and there is not a joist directly above the intersection, fasten to the closest joist. When installing under a drywall ceiling locate the hidden joist for fastener attachment.
- For best results the hanger wires should be installed using lag-eyes and the wires should be wrapped around themselves three times.
- When using a 2′ x 4′ tile system, install the Tees 4′ on-center by skipping every other keyhole.