Edge and Corner Trims
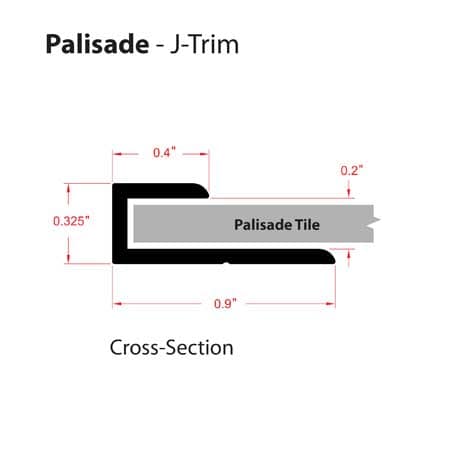
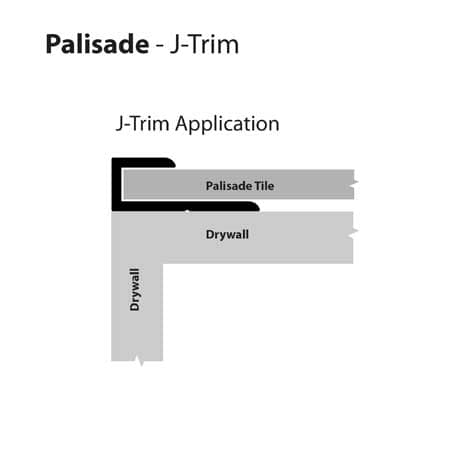
J-Trims are used to finish the terminal end of tiles when not adjoined to anything. To install, don’t dispense adhesive a few inches from the tile’s edge where you intend to use the J-Trim. This will allow the trim to slide into place. Dispense a bead of sealant into the receiving channel of the trim and then press the trim into place.
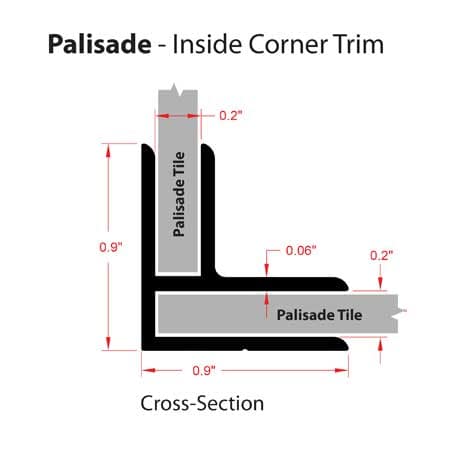
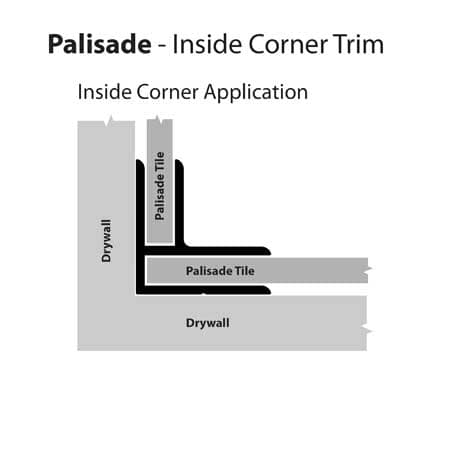
Inside Corner Trim should be attached with adhesive to the substrate. Dispense a small bead of adhesive directly to the substrate corner or on the trim itself. Also dispense a bead of sealant into each of the trim’s channels to prevent water from reaching the substrate.
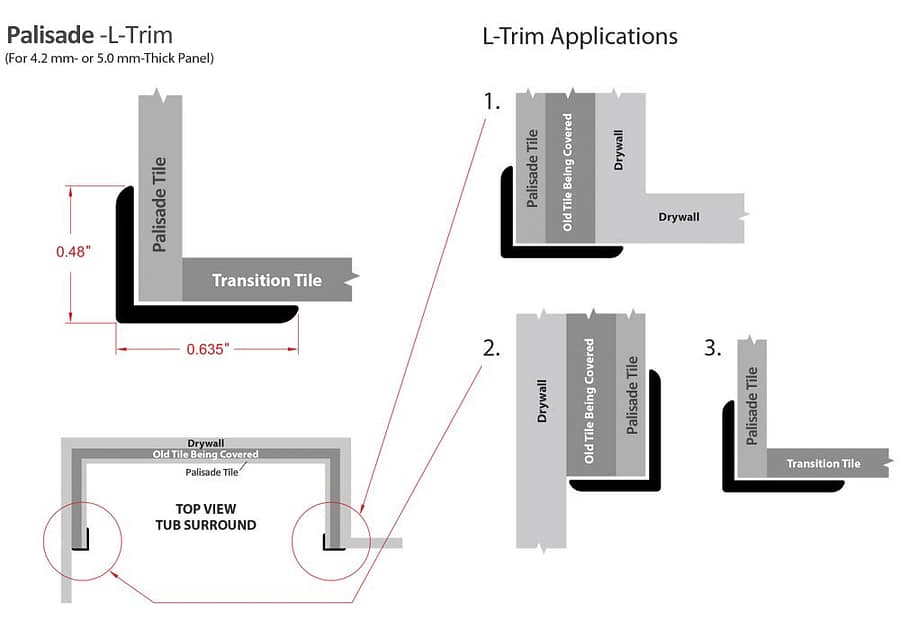
L-Trims are used to cover existing exposed tiles to provide a finished look (see drawing below). Install by dispensing a thin bead of sealant on the Palisade side and a thin bead of adhesive on the substrate side. Press trim into place. If trim will not stay in-place, use some masking or painter’s tape to hold until adhesive sets.