Tools and supplies needed:
- Protective eyewear or safety goggles
- Measuring tape
- Straightedge or Speed Square®
- Pencil
- Level (2’ to 4‘)
- Caulk gun and adhesive
- V- notch trowel 3/16” (if using trowel on mastic)
- Damp sponge for wiping off color grout and dust (if applied)
Cutting tool options:
- Tile wet saw
- Table saw or chop saw with mason cutting wheel
- Side grinder with mason wheel
Before you begin, read this installation guide in its entirety before starting.
Make sure the surface is structurally sound, play and dust and debris free for a successful installation.
Due to manufacturing variations, we cannot guarantee am exact color match from lot to lot/ Prior to installing Rustic Brick, please unpackage and lay out all purchased product to ensure color consistency. If you encounter unreasonable color variation, please call us at 1-800-434-3750(7am – 4:30pm CST, M-F) so that we can assist you with your project.
Failure to follow recommended surface preparation instructions may void the warranty. ACP, LLC is not responsible or liable for any labor costs or damaged product incurred because of improper installation. All product defects are covered under our 5-year warranty.
Layout preparation
Measure the area to be covered by Rustic Brick panels. If you are using outside corner panels, you will need to plan where that will go first. (See Installation of Outside Corner Trim section below for more information.) We also recommend you lay out the entire project on a flat surface, like a table or floor, before adhering to the substrate to be sure you have enough panels, and your design and layout is correct. This will also give you good reference as to how the panels will look on your wall. As you lay out the panels, make sure the colors and seams are to your liking.
As each project is different, be sure to plan for cutouts, corners, or edge treatments before applying panels. The edge seams will be more visible if they are not aligned, When starting a new row, we recommend a random staggered pattern.
Cutting panels
Use a tile wet saw or a mason wheel on a 4″ grinder to cut notches or other more intricate cutouts such as an electrical outlet.
Measure and layout on a panel where the cut will be made, Cut the panel. Take the cut panel to the workspace and place it in its intended location, ensuring it fits properly. Cut and install all remaining panels using the same steps described above.
NOTE: When working around electrical outlets, be sure to turn off power at the fuse box.
To cut panels for electrical receptacles or other cutouts that occur within a single panel, measure and mark the area to be cut out for the outlet box. Do not allow the panel to touch the receptacle itself. Leave about one-eight inch around the receptacle.
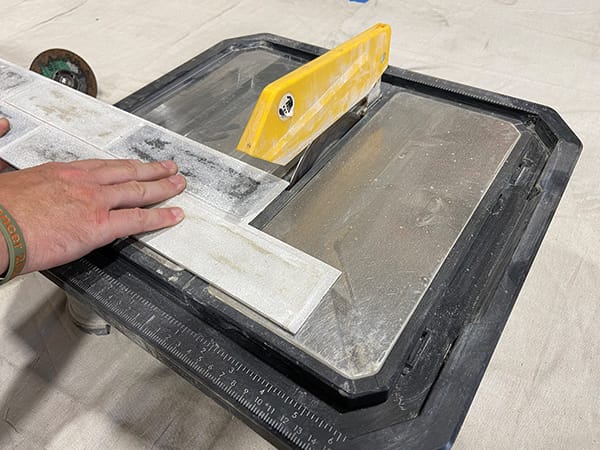
Using a tile wet saw for general cuts.

Using a mason wheel on a 4″ grinder to cut notches or more detailed cuts.
Affixing panels
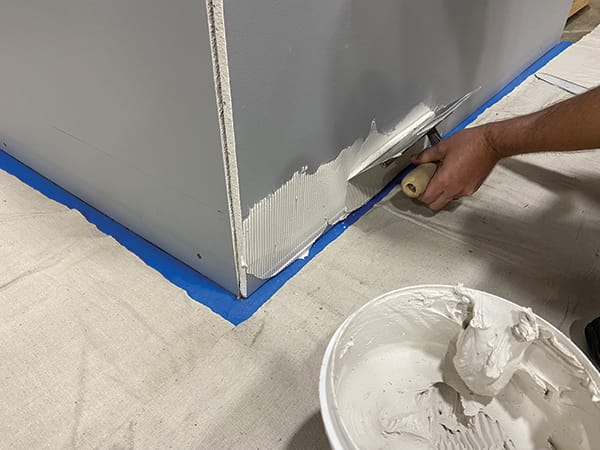
You can use a trowel-on adhesive or tube adhesive to affix panels to wall. If using a trowel-on adhesive, apply to wall first and then firmly affix the panel to the wall.
If using tube adhesive, apply to the back of each panel in a “S” pattern, keeping it half inch from the edges. If adhesive squeezes out around the panels, be sure to wipe if off before it dries.
Recommended tube adhesives:
BRAND
- Manus ®
- Loctite®
- LePage®
TYPE
- 75 AM HV
- Ultimate (white)
- No More Nails wet grab (Canada)
Recommended trowel-on adhesives:
BRAND
- TEC ®
- Mapei®
- AcrylPro ®
- AcrylPro ®
TYPE
- 1 Mastic
- 1 Mastic
- 1 Mastic
- 1 Mastic (Canada)
Installation of panels
We recommend placing the first panel (grout side up and the cut edge facing down) on the wall in the lower left. You will work your way from left to right for each row.
Be sure the top edge of your first row is level to help ensure a consistent even look throughout the entire wall.
Note: If the top of your wall is finished with trim, and you’re going to abut panels up to it, you may want to start at the ceiling and work your way down toward the floor. In this case you will want to make sure your panels are level to the top trim, while starting your first panel from an upper left inside corner and working across from left to right, You can abut the first panel to the ceiling or topmost termination point, if not a ceiling.
The first panel and all other panels that abut an inside or outside corner will need to have the overlap brick cut away so there is a straight edge.
Start with the grout edge on top.

If using outside corner pieces, start with the grout edge on top.

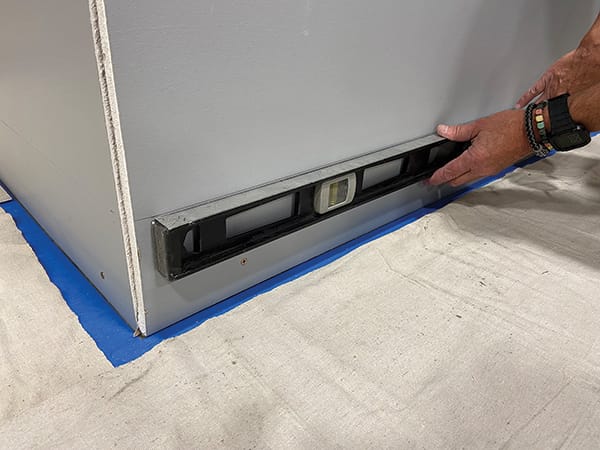
Set a level line above the floor.

Mark your level for reference to start the base row,
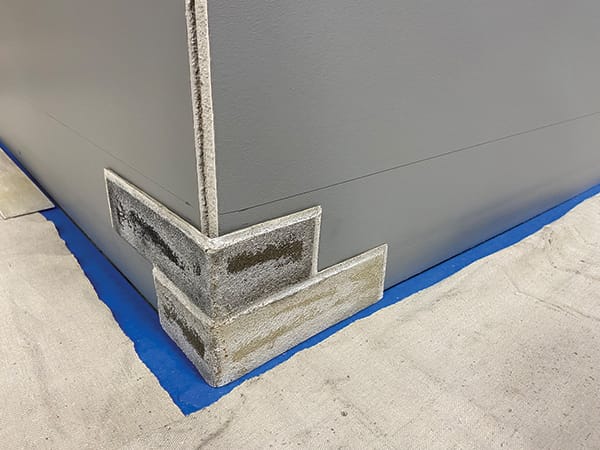
If using an outside corner piece in your design, make sure you dry fit it first and the grout edge is on top.
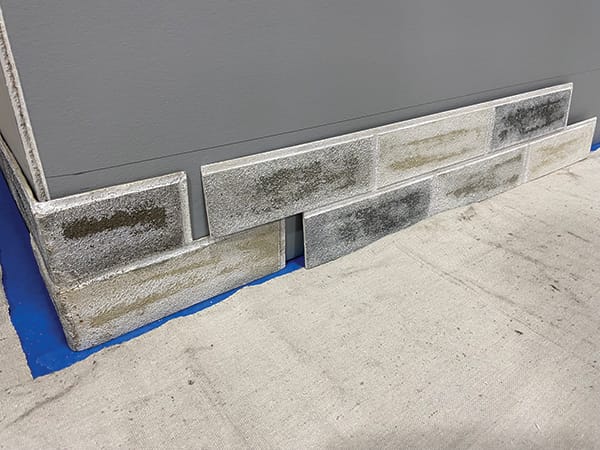
Dry fit your next piece into the outside corner to ensure fit, However, if not using outside corners, start with a cut panel piece as the starting piece for the left edge.

Apply trowel-on adhesive to the back of the panel piece.
If using tube adhesive, apply to the back of the outside corner piece.
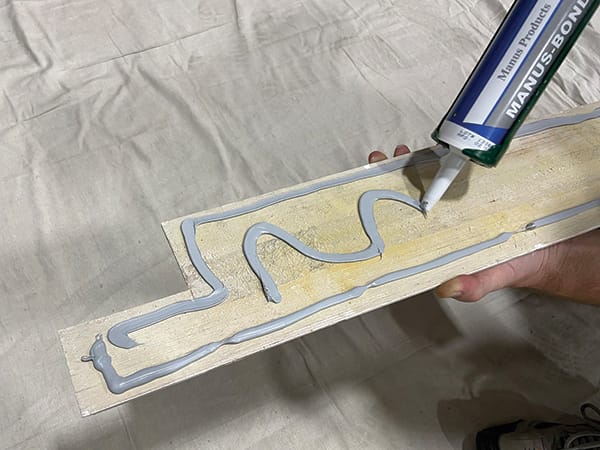
Apply tube adhesive to the back of the panel piece.
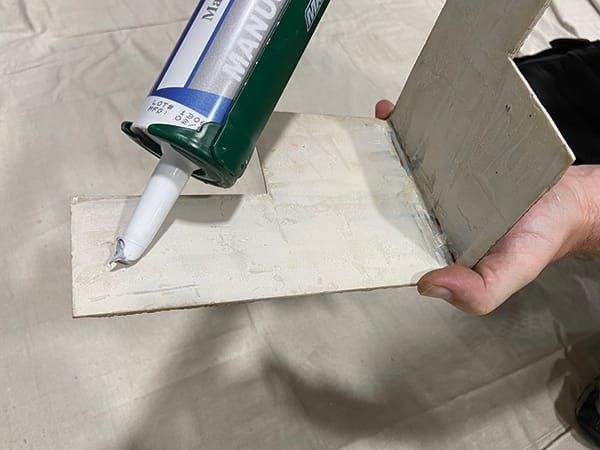
If using tube adhesive, apply to the back of the outside corner piece.
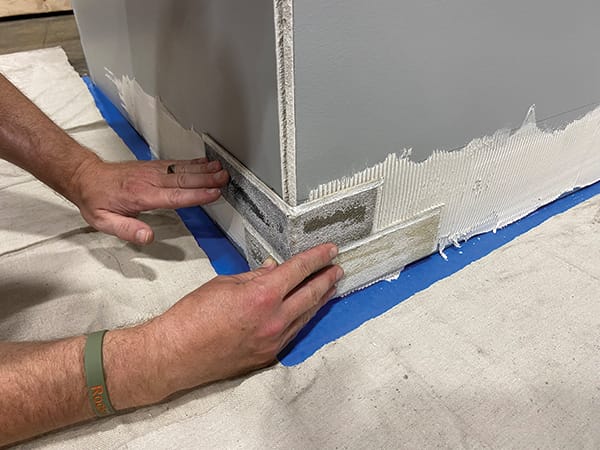
If you are using outside corner pieces, start with them on left side of overall install.
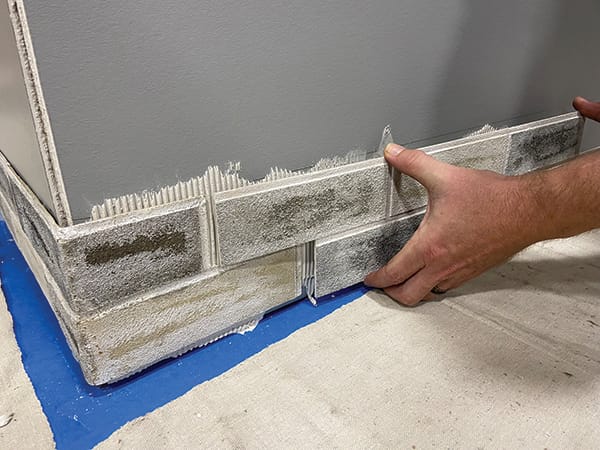
Fit the first piece up to the outside corner piece as tight as possible.

Reaching the right end, with the opposite outside corner in place, you will need to trim the final piece to fit, not that outside corner pieces have grout seams on both edges, This allows a cut brick to butt into place.
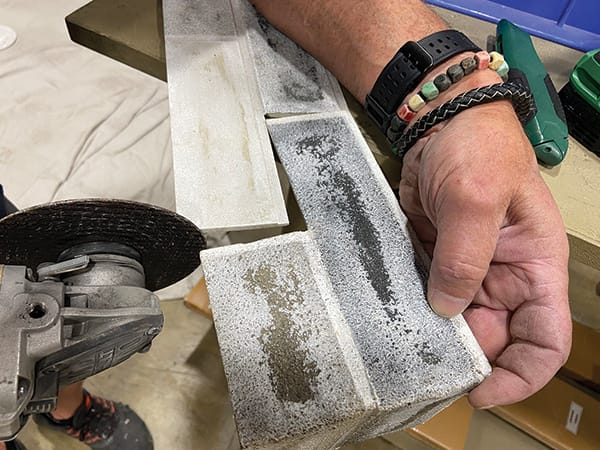
Shown here is a detail of trimming the last piece to fit into the outside corner piece that will be on the right end of the row.

Install the last piece in the first row once it is trimmed to size.

See below for joint gap fill options.
Brick gap filling if needed
use sanded colored grout, see list below. Color grout is not always the exact color of Rustic Brick grout, but that is unnoticeable once sponged out. Always follow instructions on grout product used.
Optional Grout Colorant:
BRAND
- TEC
- Custom Building Products®
TYPE
- Accu Color (choose a similar color to grout)
- Polyblend Plus (Canada) (HD)
Optional Sealers:
BRAND
- Thompsons
- Olympic®
- Olympic®
TYPE
- Water Seal
- Water Guard
- Water Guard (Canada) (HD)
Edge treatment
Many types of edge trims can be found at your local home center. Wood trims look great, too. If a cut edge showing exposed wood doesn’t match, use stain to color it to your satisfaction.
Care after installation
Rustic Brick should be cleaned, if necessary, using a soft cloth or brush attachment on a vacuum cleaner.
Layout Plans
Standard Wall

Centered Wall with outside corner pieces used


